POST · 前端 · 文章
前端项目 git 规范(Prettier + ESLint + Stylelint + EditorConfig + husky + commitlint)
2026/11/13 · by ZHANG XING YUN · 阅读 2 次 · 6239 字 · 预计阅读 16 分钟
参考:Geeker-Admin 文档 适用环境:Node ≥ 18、npm ≥ 9、git ≥ 2.13。husky 的钩子脚本依赖
sh,Windows 下由 Git 自带的 Git Bash 提供。
命令约定:全文统一用 npm。用 yarn 时把 npm install 换成 yarn add、npm run x 换成 yarn x;用 pnpm 时换成 pnpm add / pnpm x。
一、先搞清楚:这几个工具各自做什么
新手最容易卡住的地方不是"怎么配",而是"为什么要配这么多"。它们解决的是不同层面的问题,缺一个就会出现"配置打架"或"配了没效果"。
| 工具 | 生效时机 | 负责什么 | 不负责什么 |
|---|---|---|---|
| EditorConfig | 编辑器读写文件时 | 缩进风格、换行符、字符集、末尾空行 | 代码排版细节(它不会重排代码) |
| Prettier | 保存 / 提交时 | 纯排版:换行、引号、缩进、分号 | 代码对不对(不判断逻辑和写法好坏) |
| ESLint | 保存 / 提交时 | 代码质量与写法:未使用变量、var、Vue 规则 |
排版(排版交给 Prettier,避免两边打架) |
| Stylelint | 保存 / 提交时 | 样式:属性顺序、颜色写法、未知属性 | JS 逻辑 |
| husky | git commit 时 |
提供 git 钩子,在提交时执行命令 | 校验逻辑本身(它只是"触发器") |
| lint-staged | 由 pre-commit 钩子调用 | 只对暂存区文件跑 lint / 格式化 | 全量检查(全量请用 npm script) |
| commitlint | 由 commit-msg 钩子调用 | 校验 commit message 是否符合 Conventional Commits | 代码内容 |
一句话记住分工:EditorConfig 管编辑器默认值,Prettier 管排版,ESLint / Stylelint 管质量,husky 管"什么时候跑",lint-staged 管"只跑改动的文件",commitlint 管"提交信息写没写对"。
1.1 一次提交发生了什么
┌────────────── 编辑器内(写代码时) ──────────────┐
│ EditorConfig          缩进 / 换行 / 字符集        │
│ 保存时 formatOnSave   → Prettier 排版             │
│ 保存时 fixAll         → ESLint / Stylelint 修复   │
└───────────────────────────────────────────────────┘
                        │
                   git commit
                        │
      ┌─────────────────▼──────────────────┐
      │ pre-commit 钩子                     │
      │   └─ lint-staged(只看暂存区文件)    │
      │        ├─ eslint --fix              │
      │        ├─ prettier --write          │
      │        └─ stylelint --fix           │
      │   任一步失败 → 提交被中断            │
      └─────────────────┬──────────────────┘
                        │
      ┌─────────────────▼──────────────────┐
      │ commit-msg 钩子                     │
      │   └─ commitlint 校验 message        │
      │      不符合规范 → 提交被中断         │
      └─────────────────┬──────────────────┘
                        │
                   写入 commit
理解这张图就能明白两件事:
- 编辑器里的格式化只是"第一道防线",可以被绕过(换台电脑、换 IDE 就没了),所以提交时的钩子必须在。
- 钩子也能被绕过(
git commit --no-verify),所以真正的强制约束要放在 CI:npm run lint:eslint、npm run lint:stylelint在流水线里再跑一次。
1.2 为什么不能只留一个工具
- 只用 Prettier:它只管排版,
var、未使用变量、改 prop 这些它一概不管。 - 只用 ESLint:它的排版规则和 Prettier 经常互相打架(一个要单引号、一个要双引号),最后"格式化"按钮点一次代码就面目全非。
- 正确做法:Prettier 负责排版,ESLint 负责质量,再用
eslint-config-prettier把 ESLint 里排版相关的规则全部关掉,两者各管一段。
二、前置条件
动手前先确认三件事,否则后面总有一环报错:
node -v   # 需要 ≥ 18(commitlint 19 要求 Node 18+)
npm -v    # 需要 ≥ 9
git --version  # 需要 ≥ 2.13

# 1)项目必须是 git 仓库,且已配置远端
git init
git remote add origin <你的仓库地址>

# 2)只保留一种包管理器的锁文件
#    示例工程的 vite-project 里同时存在 package-lock.json 和 yarn.lock,
#    实际项目请删掉不用的那个,否则不同人装出不同依赖树
本文所有配置都放在项目根目录。
vite-project就是这个"根目录"的范例,不要在子目录里另起一套。
三、Prettier(代码格式化)
1. 安装依赖
npm install prettier@^3 -D
2. 安装 VS Code 插件(Prettier)
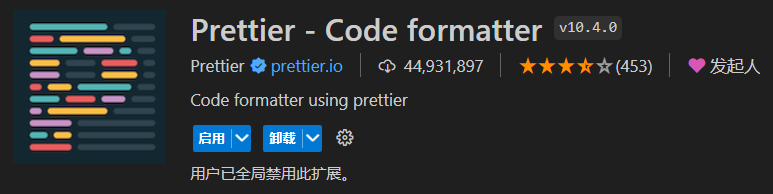
它负责执行格式化;真正生效靠的是第七节的 editor.formatOnSave + editor.defaultFormatter。
3. 配置 .prettierrc.js
module.exports = {
	// 一行最多多少字符,超过才换行
	printWidth: 130,
	// 一个缩进占多少列(useTabs 为 true 时表示 tab 的显示宽度)
	tabWidth: 2,
	// 用 tab 缩进;false 表示用空格
	useTabs: true,
	// 语句末尾加分号
	semi: true,
	// 用双引号;true 表示用单引号
	singleQuote: false,
	// 对象属性何时加引号:as-needed 仅必要时加
	quoteProps: "as-needed",
	// 对象字面量括号内留空格:{ foo: bar }
	bracketSpacing: true,
	// 多行结构末尾是否加逗号,可选 none | es5 | all(Prettier 3 默认是 all,这里显式关掉)
	trailingComma: "none",
	// JSX 属性用双引号;true 表示用单引号
	jsxSingleQuote: false,
	// 单参数箭头函数是否省略括号:avoid 省略,always 保留
	arrowParens: "avoid",
	// 是否在文件顶部插入 /** @format */ 标记(true 才插入)
	insertPragma: false,
	// 是否只格式化带 @format 标记的文件(true 才限制,false 表示全部格式化)
	requirePragma: false,
	// Markdown 换行策略:preserve 保持原文换行
	proseWrap: "preserve",
	// HTML 中空格的敏感度:css 遵循 CSS 显示属性的默认行为(strict 敏感 / ignore 不敏感)
	htmlWhitespaceSensitivity: "css",
	// 换行符统一为 LF,避免 Windows 的 CRLF 混进仓库
	endOfLine: "lf",
	// 只格式化文件中 [rangeStart, rangeEnd) 区间的代码,默认全文
	rangeStart: 0,
	rangeEnd: Infinity,
	// <script> 与 <style> 的内容是否再缩进一层
	vueIndentScriptAndStyle: false
};
4. 配置 .prettierignore
/dist/*
/public/*
/node_modules/**
/.husky/*
/.vscode/*

# 锁文件不要格式化,否则每次改动都会产生大量无意义 diff
/package-lock.json
/yarn.lock
/pnpm-lock.yaml
四、ESLint(代码质量)
1. 安装依赖
npm install eslint@^8 eslint-config-prettier eslint-plugin-prettier eslint-plugin-vue vue-eslint-parser -D
| 依赖 | 作用 |
|---|---|
eslint |
ESLint 核心库(v8 与 v9 的配置格式差异很大,本文基于 v8 的 .eslintrc 旧格式) |
eslint-config-prettier |
关闭所有与 Prettier 冲突的 ESLint 排版规则 |
eslint-plugin-prettier |
把 Prettier 的规则以插件形式接进 ESLint |
eslint-plugin-vue |
Vue 单文件组件规则 |
vue-eslint-parser |
解析 .vue 文件(虽是 eslint-plugin-vue 的依赖,显式安装更稳) |
示例工程是纯 JS 模板,所以没装
@typescript-eslint/*;装了却把配置全注释掉,是新手最容易犯的"装了一堆没用的包"。 TS 项目再补:npm install @typescript-eslint/eslint-plugin @typescript-eslint/parser -D,并打开下文中两处注释。
2. 安装 VS Code 插件(ESLint)
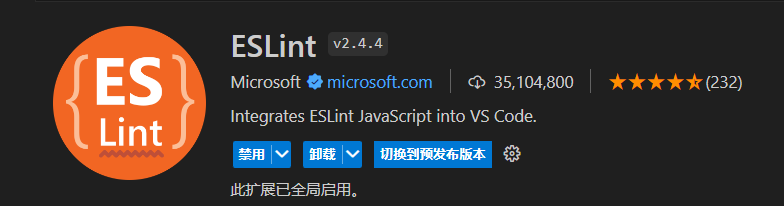
3. 配置 .eslintrc.js
module.exports = {
	root: true,
	env: {
		browser: true,
		node: true,
		es6: true
	},
	/* 指定如何解析语法:.vue 文件需要 vue-eslint-parser */
	parser: "vue-eslint-parser",
	/* 解析器的补充配置 */
	parserOptions: {
		// TS 项目改为:parser: "@typescript-eslint/parser",
		ecmaVersion: 2020,
		sourceType: "module",
		ecmaFeatures: {
			jsx: true
		}
	},
	/* 继承已有的规则集,越靠后优先级越高 */
	extends: [
		"plugin:vue/vue3-recommended",
		// TS 项目加:plugin:@typescript-eslint/recommended
		"plugin:prettier/recommended"
	],
	/*
	 * "off" 或 0  → 关闭规则
	 * "warn" 或 1 → 警告,不影响代码执行
	 * "error" 或 2 → 错误,界面标红、CI 失败
	 */
	rules: {
		// ---- ESLint 原生规则 ----
		"no-var": "error", // 禁止 var,要求 let / const
		"no-multiple-empty-lines": ["error", { max: 1 }], // 最多一个连续空行
		"no-use-before-define": "off", // 关闭"定义前使用"检查(Vue / 函数提升场景易误报)
		"prefer-const": "error", // 声明后未重新赋值的变量要求用 const
		"no-irregular-whitespace": "off", // 允许注释、字符串里的全角空格
		"no-console": "warn", // console 只提醒不拦截

		// ---- Vue 规则 ----
		"vue/no-v-html": "off", // 允许 v-html(确认渲染内容可信时可关)
		"vue/v-slot-style": "error", // 统一 v-slot 写法
		"vue/no-mutating-props": "off", // 关闭"禁止直接改 prop"(开启需改写为 emit)
		"vue/custom-event-name-casing": "off", // 自定义事件名不强制大小写
		"vue/attributes-order": "off", // 属性顺序交给 Prettier,不重复管
		"vue/one-component-per-file": "off", // 允许一个文件里放多个组件
		"vue/html-closing-bracket-newline": "off", // 标签右括号是否换行,交给 Prettier
		"vue/max-attributes-per-line": "off", // 每行属性个数,交给 Prettier
		"vue/multiline-html-element-content-newline": "off",
		"vue/singleline-html-element-content-newline": "off",
		"vue/attribute-hyphenation": "off", // 属性名不强制连字符
		"vue/require-default-prop": "off", // 不强制非必填 prop 给默认值
		"vue/multi-word-component-names": "off" // 允许 App.vue、index.vue 这类单词名
	}
};
关于
vue/script-setup-uses-vars:网上大量旧教程会让你开这条规则,但vue-eslint-parserv9 起已内置该能力,规则本身也已在eslint-plugin-vuev10 中移除,不要加(加了升级时会直接报 unknown rule)。
4. 配置 .eslintignore
node_modules
dist
public
.vscode
.husky
*.md
五、Stylelint(样式规范)
1. 安装依赖
npm i stylelint stylelint-config-html stylelint-config-standard stylelint-config-standard-scss stylelint-config-recommended-scss stylelint-config-recommended-vue stylelint-config-recess-order postcss postcss-html -D
| 依赖 | 作用 |
|---|---|
stylelint |
核心库(本文基于 v16) |
stylelint-config-html |
共享配置,内部捆绑并配置好 postcss-html,用于 HTML / Vue 模板 |
stylelint-config-standard |
通用 CSS 约定(惯用 CSS、Google / Airbnb 指南等) |
stylelint-config-standard-scss |
在 standard 基础上补充 SCSS 规则 |
stylelint-config-recommended-scss |
recommended 级别的 SCSS 规则(被下面的 vue 配置依赖) |
stylelint-config-recommended-vue |
补充 Vue 单文件组件规则(/scss 后缀表示按 SCSS 解析 <style lang="scss">) |
stylelint-config-recess-order |
属性书写顺序(本质是 order 插件) |
postcss / postcss-html |
解析 HTML 与类似 HTML 的语法(postcss 是 postcss-html 的依赖) |
不再需要
stylelint-config-prettier:stylelint 15 起已移除格式化类规则,与 Prettier 不再冲突。2023 年之前的教程都还带着它,照抄会装了却无用。
2. 安装 VS Code 插件(Stylelint)
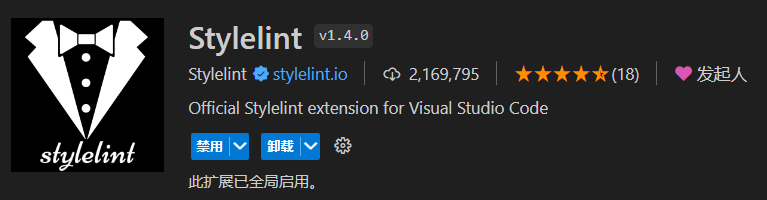
3. 配置 .stylelintrc.js
module.exports = {
	/* 继承已有的规则,顺序决定优先级:越靠后越优先 */
	extends: [
		"stylelint-config-standard", // 通用 CSS 规则
		"stylelint-config-html/vue", // 让 .vue 模板里的样式也能被解析
		"stylelint-config-standard-scss", // SCSS 规则
		"stylelint-config-recommended-vue/scss", // Vue + SCSS 规则
		"stylelint-config-recess-order" // 属性顺序(放最后,覆盖前面的顺序规则)
	],
	overrides: [
		// 扫描 .vue / .html 文件里 <style> 标签中的样式
		{
			files: ["**/*.{vue,html}"],
			customSyntax: "postcss-html"
		}
	],
	/**
	 * null 表示关闭该规则
	 */
	rules: {
		"function-url-quotes": "always", // url() 必须带引号
		"color-hex-length": "long", // 16 进制颜色写全称(#ffffff 而非 #fff)
		"rule-empty-line-before": "never", // 规则前不留空行
		"font-family-no-missing-generic-family-keyword": null, // 关闭:允许字体栈不带 serif/sans-serif
		"scss/at-import-partial-extension": null, // 关闭:允许 @import 不带扩展名
		"property-no-unknown": null, // 关闭:兼容自定义属性
		"no-empty-source": null, // 关闭:允许空样式文件
		"selector-class-pattern": null, // 关闭:不强制类名格式(BEM / 驼峰团队自定)
		"value-no-vendor-prefix": null, // 关闭:多行省略要用 -webkit-box
		"no-descending-specificity": null, // 关闭:避免嵌套写法被大量误报
		"value-keyword-case": null, // 关闭:SCSS 中 v-bind 大写单词会误报
		"selector-pseudo-class-no-unknown": [
			true,
			{
				ignorePseudoClasses: ["global", "v-deep", "deep"] // Vue / CSS Modules 的伪类
			}
		]
	},
	// 这些文件不参与样式检查
	ignoreFiles: ["**/*.js", "**/*.jsx", "**/*.tsx", "**/*.ts"]
};
4. 配置 .stylelintignore
dist
public
node_modules
六、EditorConfig(编辑器基础风格)
它不负责排版,只告诉编辑器"这个项目用 tab、用 LF、UTF-8、末尾留空行"。装的是插件,配置的是根目录的 .editorconfig。
1. 安装 VS Code 插件(EditorConfig for VS Code)

2. 配置 .editorconfig
# https://editorconfig.org
root = true

# 所有文件
[*]
charset = utf-8
end_of_line = lf
insert_final_newline = true
indent_style = tab
indent_size = 2
max_line_length = 130

# Markdown 不限制行宽,也不修剪行尾空格(影响换行渲染)
[*.md]
max_line_length = off
trim_trailing_whitespace = false
这里有一个必踩的坑:EditorConfig 的注释只能独占一行,# 出现在行中间不算注释,而是值的一部分。所以下面这种写法是错的:
# ❌ 错误示范:charset 的值会变成 "utf-8 # 设置文件字符集为 utf-8"
charset = utf-8 # 设置文件字符集为 utf-8
同理 [*] # 表示所有文件适用 这种行既不是 section 也不是键值对,会让后面的整段规则静默失效。规范说明见 EditorConfig Specification。
补充:
max_line_length不在 EditorConfig 官方规范的键列表里,属于部分插件(含 VS Code 扩展)支持的扩展键;真正决定换行宽度的是 Prettier 的printWidth,两者保持一致即可。
七、VS Code 工作区配置
1. .vscode/settings.json
{
	// 保存时自动格式化,交给 Prettier 执行
	"editor.formatOnSave": true,
	"editor.defaultFormatter": "esbenp.prettier-vscode",
	// 保存时执行 ESLint / Stylelint 的自动修复
	"editor.codeActionsOnSave": {
		"source.fixAll.eslint": "explicit",
		"source.fixAll.stylelint": "explicit"
	},
	// 没有配置文件就不格式化,避免个人默认配置污染项目
	"prettier.requireConfig": true,
	// 关掉 VS Code 自带的 CSS 校验,避免和 Stylelint 重复报错
	"css.validate": false,
	"less.validate": false,
	"scss.validate": false,
	"stylelint.validate": ["css", "less", "postcss", "scss", "sass", "vue", "html"],
	"eslint.validate": ["javascript", "vue", "typescript"],
	// 换行符统一 LF(和 .editorconfig 保持一致)
	"files.eol": "\n"
}
settings.json是 JSONC 格式,VS Code 允许注释和尾逗号;但要交给别的工具(比如 CI 里的脚本)读取前,得先去掉注释。
2. 必须提交到仓库
# .gitignore
.vscode/*
!.vscode/extensions.json
!.vscode/settings.json
这两行 ! 例外很关键:默认 .gitignore 忽略整个 .vscode,如果不同时放行 settings.json,你写完配置提交不上去,团队其他人拉代码后"保存自动修复"全部失效——这是"配了但没生效"最常见的原因。
3. .vscode/extensions.json(插件推荐)
{
	"recommendations": [
		"esbenp.prettier-vscode",
		"dbaeumer.vscode-eslint",
		"stylelint.vscode-stylelint",
		"editorconfig.editorconfig",
		"Vue.volar"
	]
}
同事打开项目时 VS Code 会提示"安装推荐扩展",省去逐个解释。
八、husky + lint-staged(提交前校验)
1. husky:让 git 愿意执行项目里的脚本
git 本身支持钩子,但钩子放在 .git/hooks 里,不会被提交。husky 的作用是把钩子目录改到项目内的 .husky/,从而能纳入版本管理。
npm install husky@^8 -D
2. 生成 .husky 目录
不要手写 .husky,用 husky 自己生成;生成后还要把它挂到 git 上:
# 等价于"在 scripts 里加一行 prepare";npm 9 起 set-script 已移除,用 pkg set
npm pkg set scripts.prepare="husky install"

# 执行 prepare,生成 .husky/_ 与相关脚本
npm run prepare
prepare的特殊之处:它在npm install之后自动执行。所以新同事克隆仓库后只要跑一次npm install,钩子就自动就位;反之,如果.husky/_不存在,提交时不会有任何校验——这是"钩子没反应"第一位的原因。
另一个坑:husky 8 的
install只检查当前目录下有没有.git,并把core.hooksPath设成相对当前目录的路径。所以它必须在 git 仓库根目录执行。如果项目嵌在别的仓库里(本示例的vite-project就位于research仓库内部),会直接报husky - .git can't be found。解决办法:把它单独git init成一个仓库,或者只把这套配置搬到你自己项目的仓库根目录使用(示例工程因此无法就地演示钩子,本文的钩子验证请在自己的仓库里做)。
3. lint-staged:只检查暂存区的文件
全量 lint 一个老项目可能要几十秒,每次提交都等不现实。lint-staged 把暂存的文件名取出来,只对它们执行命令。
npm install lint-staged -D
4. 添加 pre-commit 钩子
npx husky add .husky/pre-commit "npm run lint:lint-staged"
生成的内容:
#!/usr/bin/env sh
. "$(dirname -- "$0")/_/husky.sh"

npm run lint:lint-staged
5. 配置 lint-staged.config.js
module.exports = {
	// 脚本类:先 ESLint 修,再 Prettier 排版
	"**/*.{js,jsx,ts,tsx,vue}": ["eslint --fix", "prettier --write"],
	// 样式类:Stylelint 修完再 Prettier(.vue / .html 里的 <style> 也会被扫到)
	"**/*.{css,less,scss,sass,styl,postcss,html,vue}": ["stylelint --fix", "prettier --write"],
	// 配置与文档
	"**/*.{json,jsonc,md,yml,yaml}": ["prettier --write"]
};
三个容易写错的点:
- 用
**/前缀。lint-staged 的 glob 是对相对路径匹配的,*.vue在部分版本上只能匹配根目录文件,写**/*.vue才稳。 - 命令里的空格不能少。
prettier --write --parser json是对的,prettier --write--parser json会把整个--write--parser当成一个参数,直接报错。 - 锁文件别进来。
package-lock.json交给包管理器管,已在.prettierignore里排除。
九、commitlint(提交信息校验)
1. 安装
npm i @commitlint/cli @commitlint/config-conventional -D
2. 先写配置文件,再加钩子(顺序不能反)
// commitlint.config.js
const fs = require("fs");
const path = require("path");

// 以 src 下的一级目录作为可选 scope(assets → asset);目录不存在时返回空数组,避免加载即报错
const srcPath = path.resolve(__dirname, "src");
const scopes = fs.existsSync(srcPath)
	? fs
			.readdirSync(srcPath, { withFileTypes: true })
			.filter(dirent => dirent.isDirectory())
			.map(dirent => dirent.name.replace(/s$/, ""))
	: [];

module.exports = {
	ignores: [commit => commit === "init"], // init 这类初始提交放行
	extends: ["@commitlint/config-conventional"], // 基于 Angular 提交规范
	rules: {
		"body-leading-blank": [2, "always"], // body 前必须有空行
		"footer-leading-blank": [1, "always"], // footer 前建议有空行(1 = 警告)
		"header-max-length": [2, "always", 108], // 标题最长 108 字符
		"subject-empty": [2, "never"], // 描述不能为空
		"type-empty": [2, "never"], // 类型不能为空
		"subject-case": [0] // 不检查描述大小写
	},
	prompt: {
		// ……见第十节
	}
};
.replace(/s$/, "")是把目录名末尾的 s 去掉(assets→asset、components→component),这样 scope 看起来更像单数名词;如果不需要,把这一行删掉即可。
3. 添加 commit-msg 钩子
npx husky add .husky/commit-msg 'npx --no-install commitlint --edit "$1"'
生成的内容:
#!/usr/bin/env sh
. "$(dirname -- "$0")/_/husky.sh"

npx --no-install commitlint --edit "$1"
$1 是 git 传进来的 message 文件路径(.git/COMMIT_EDITMSG),--no-install 保证不会临时去下载依赖。
4. 手动调试验证
echo "随便写一句" | npx commitlint        # 应报 type-empty
echo "feat: 新增登录" | npx commitlint    # 应通过
十、commitizen + cz-git(交互式生成 message)
commitlint 只能"拦",不能"帮你写"。commitizen 提供 git cz 这样的交互式提问,cz-git 是它的适配器,负责把提问结果拼成规范的 message。
# 装到项目里,不要用 -g:全局包随 node 版本变化,CI 和新同事都会踩坑
npm install commitizen cz-git -D
在 package.json 中指定适配器:
"config": {
	"commitizen": {
		"path": "node_modules/cz-git"
	}
}
再补上 commitlint.config.js 的 prompt 段(cz-git 会读它):
	prompt: {
		messages: {
			type: "选择你要提交的类型 :",
			scope: "选择一个提交范围(可选):",
			customScope: "请输入自定义的提交范围 :",
			subject: "填写简短精炼的变更描述 :\n",
			body: '填写更加详细的变更描述(可选)。使用 "|" 换行 :\n',
			breaking: '列举非兼容性重大的变更(可选)。使用 "|" 换行 :\n',
			footerPrefixsSelect: "选择关联 issue 前缀(可选):",
			customFooterPrefixs: "输入自定义 issue 前缀 :",
			footer: "列举关联 issue(可选)例如: #31, #I3244 :\n",
			confirmCommit: "是否提交或修改 commit ?"
		},
		// 注意:value 必须是纯 type 标识(feat / fix / docs ...),中文只放在 name 里。
		// 若写成 value: "feat: 特性",cz-git 拼出的 header 会变成 "feat: 特性: 🚀 新增功能":
		// commitlint 仍能通过(type 解析为 feat),但 subject 会被解析成"特性: 🚀 新增功能",
		// 语义里混进了类型名,肉眼和按 "type: subject" 取值的工具(changelog、自定义脚本)都会误读。
		types: [
			{ value: "feat", name: "feat:   🚀  新增功能", emoji: "🚀" },
			{ value: "fix", name: "fix:   🧩  修复缺陷", emoji: "🧩" },
			{ value: "docs", name: "docs:   📚  文档变更", emoji: "📚" },
			{ value: "style", name: "style:   🎨  代码格式(不影响功能,如空格、分号)", emoji: "🎨" },
			{ value: "refactor", name: "refactor:   ♻️  代码重构(不含 bug 修复与新增功能)", emoji: "♻️" },
			{ value: "perf", name: "perf:   ⚡️  性能优化", emoji: "⚡️" },
			{ value: "test", name: "test:   ✅  新增或修改测试", emoji: "✅" },
			{ value: "chore", name: "chore:   📦️  构建流程、依赖变更(升级包、改配置等)", emoji: "📦️" },
			{ value: "ci", name: "ci:   🎡  修改 CI 配置、脚本", emoji: "🎡" },
			{ value: "revert", name: "revert:   ⏪️  回滚 commit", emoji: "⏪️" },
			{ value: "build", name: "build:   🔨  项目打包发布", emoji: "🔨" }
		],
		useEmoji: true,
		scopes: [...scopes], // 复用上面从 src 目录生成的范围
		customScopesAlign: "bottom",
		emptyScopesAlias: "空",
		customScopesAlias: "自定义",
		allowBreakingChanges: ["feat", "fix"] // 只有这两类允许 BREAKING CHANGE
	}
生成效果:

十一、package.json 脚本
{
	"scripts": {
		"dev": "vite",
		"build": "vite build",
		"preview": "vite preview",

		"lint:eslint": "eslint --fix --ext .js,.ts,.vue ./src",
		"lint:prettier": "prettier --write --log-level warn \"src/**/*.{js,ts,json,tsx,css,less,scss,vue,html,md}\"",
		"lint:stylelint": "stylelint --fix \"**/*.{vue,less,postcss,css,scss}\" --cache --cache-location node_modules/.cache/stylelint/",
		"lint:lint-staged": "lint-staged",

		"prepare": "husky install",
		"commit": "git-cz"
	}
}
几个说明:
lint:stylelint里--cache只写一次,重复写会告警。prettier3 把--loglevel改名成了--log-level。旧写法不会报错,只会打印一条Ignored unknown option,但日志级别其实没生效,抄旧教程时注意。commit只负责生成 message 并提交,不包含git add -A和git push。把三件事捆在一起的脚本(git add -A && git-cz && git push)会把调试代码一起提交、并跳过 review,不适合作为团队规范。正确姿势:git add -p # 逐个确认要提交的改动 npm run commit # 交互式填写 message git push # 确认无误后手动推送eslint --fix --ext是 ESLint 8 的写法,v9 移除了--ext。- TypeScript 项目在
build前加类型检查,但需要额外装typescript与vue-tsc(示例工程是 JS 模板,没有这两样,照抄会报 "vue-tsc not found"):"build": "vue-tsc --noEmit && vite build"
十二、配套文件:ignore、.gitattributes、目录清单
这些文件不"炫技",但直接决定规则会不会误伤。建议一个都不要少。
1. .gitattributes(Windows 团队必配)
# 统一换行符:仓库里始终是 LF,检出时按平台自动转换
* text=auto eol=lf

# 二进制文件不要转换
*.png binary
*.jpg binary
*.ico binary
*.woff binary
*.woff2 binary
没有这个文件时,Windows 上 core.autocrlf=true(git 默认)会产生 CRLF 文件,Prettier 的 endOfLine: "lf" 会把每个文件都"改一遍",于是每次提交都是几百行无意义 diff。
2. ignore 文件一览
| 文件 | 作用 | 本工程内容 |
|---|---|---|
.gitignore |
哪些文件不进仓库 | 忽略 node_modules、dist、.vscode/*(放行 settings.json、extensions.json) |
.eslintignore |
哪些文件不 lint | node_modules、dist、public、.husky、*.md |
.prettierignore |
哪些文件不格式化 | dist、public、node_modules、锁文件 |
.stylelintignore |
哪些文件不查样式 | dist、public、node_modules |
3. 目录结构(示例工程)
gitSubSpec/
├─ 说明文档.md
├─ img/                      # 文档截图
└─ vite-project/             # 可运行的示例工程
   ├─ .editorconfig
   ├─ .eslintrc.js
   ├─ .eslintignore
   ├─ .prettierrc.js
   ├─ .prettierignore
   ├─ .stylelintrc.js
   ├─ .stylelintignore
   ├─ .gitattributes
   ├─ .gitignore
   ├─ .husky/
   │  ├─ pre-commit
   │  └─ commit-msg
   ├─ .vscode/
   │  ├─ settings.json
   │  └─ extensions.json
   ├─ commitlint.config.js
   ├─ lint-staged.config.js
   └─ package.json
十三、验证是否真的生效
配置写完不验证,等于没配。按顺序做这几步,每步都要看到"应该出现的报错/变化":
① 格式化是否生效
# 故意把某行写长、把缩进改成空格,然后
npx prettier --check src/App.vue     # 应报 warn,提示文件不符合格式
npm run lint:prettier                # 应自动改回
② ESLint 是否生效
// src/main.js 临时加一行
var a = 1;
npm run lint:eslint # 应报 no-var 错误
③ Stylelint 是否生效
在 src/App.vue 的 <style> 里写 color: #fff;:
npm run lint:stylelint # 应报 color-hex-length(要求 #ffffff);属性顺序会被自动重排
④ 提交钩子是否生效
git add .
git commit -m "随便写"    # 应被 commitlint 拒绝,提示 type-empty
npm run commit            # 交互式填写后应能成功提交
⑤ 绕过钩子(了解即可)
git commit --no-verify -m "chore: 应急提交" # 跳过所有钩子
所以规范类检查在 CI 里必须再跑一遍,否则钩子形同虚设。
十四、常见问题 FAQ
Q1:改完代码提交,什么钩子都没触发?
按顺序排查:
.husky/_/目录是否存在。不存在说明从没执行过npm install或npm run prepare。git config core.hooksPath是否为.husky(husky 8 装完会设置)。- Linux / macOS 下钩子文件是否有执行权限:
chmod +x .husky/pre-commit。 - IDE 自带的 git 客户端可能不执行钩子,改用命令行验证一次。
Q2:npm install 时报 husky install 失败?
两种原因:① 依赖里还没装 husky;② 当前目录不是 git 仓库(CI 里拉取源码时常见)。CI 中可写成 "prepare": "husky install || true"。
Q3:每次提交都提示几十个文件格式不一致,diff 巨大?
Windows 换行符问题。补 .gitattributes(* text=auto eol=lf),然后统一转一次:git add --renormalize .,再提交。
Q4:ESLint 报 unknown rule vue/script-setup-uses-vars?
该规则在 eslint-plugin-vue v10 中已移除,vue-eslint-parser v9 之后也不再需要,直接删掉这条配置。
Q5:Stylelint 报 Could not find "stylelint-config-prettier",或装了没用?
stylelint 15 起移除了格式化规则,该配置已废弃,从 extends 和依赖里一并删除。
Q6:npm set-script 报 Unknown command?
npm 9 起移除了该子命令,改用 npm pkg set scripts.prepare="husky install"。
Q7:git-cz: command not found?
commitizen 被装成了全局包,或根本没装。装到项目里:npm i commitizen cz-git -D,然后用 npm run commit 或 npx cz。
Q8:husky v9 的写法为什么不生效?
v9 移除了 husky install 与 husky add,改为:
npm i -D husky@^9
npx husky init                                   # 生成 .husky/pre-commit
echo "npm run lint:lint-staged" > .husky/pre-commit
echo 'npx --no-install commitlint --edit "$1"' > .husky/commit-msg
Q9:ESLint 想升到 9,会有什么变化?
ESLint 9 默认使用 flat config(eslint.config.js),.eslintrc.js 不再被读取;--ext 参数被移除(改为在配置里声明 files);eslint-plugin-vue 需要 v9+ 的 flat 预设。本文方案停留在 v8,迁移前先确认团队依赖都支持 flat config。
Q10:示例工程里为什么有两个锁文件?
vite-project 里 package-lock.json 与 yarn.lock 都被提交过(截图用的是 yarn)。实际项目只保留一个,否则不同包管理器会装出不同的依赖树。
Q11:npm run prepare 报 husky - .git can't be found?
当前目录不是 git 仓库根目录。husky 8 只认当前目录下的 .git,子目录(包括嵌在父仓库里的子工程)都会失败。请在仓库根目录执行,或把子工程单独 git init。
Q12:npm run lint:prettier 里那条 Ignored unknown option --loglevel 警告是什么?
Prettier 3 把参数名改成了 --log-level,改成新写法即可。
十五、版本矩阵与升级提示
| 工具 | 本文使用 | 说明 |
|---|---|---|
| Node | ≥ 18 | commitlint 19 要求 Node 18+ |
| prettier | ^3 | 3.x 默认 trailingComma: "all"、arrowParens: "always",与 2.x 默认值不同 |
| eslint | ^8 | 仍是 .eslintrc 旧格式;8.x 已停止维护,新项目建议直接评估 v9 |
| eslint-plugin-vue | ^9 | v10 移除 vue/script-setup-uses-vars |
| stylelint | ^16 | 15 起移除格式化规则,stylelint-config-prettier 不再需要 |
| husky | ^8 | v9 用 husky init 替代 husky install / husky add |
| lint-staged | ^15 | glob 建议统一用 **/ 前缀 |
| commitlint | ^19 | 需 Node 18+;--no-install 可避免临时下载 |
附录:从零搭建的顺序清单
顺序很重要,踩坑大多来自"先加钩子、后建配置"。
git init+ 配置远端,确认只有一个锁文件。- 装依赖:
npm i -D prettier eslint@^8 eslint-config-prettier eslint-plugin-prettier eslint-plugin-vue vue-eslint-parser,以及第五节的 stylelint 全家桶。 - 写
.editorconfig(注释独占一行)。 - 写
.prettierrc.js、.prettierignore。 - 写
.eslintrc.js、.eslintignore。 - 写
.stylelintrc.js、.stylelintignore。 - 写
.gitattributes,执行git add --renormalize .统一换行符。 - 写
.vscode/settings.json、.vscode/extensions.json,并在.gitignore里放行。 npm i -D husky@^8 lint-staged→npm pkg set scripts.prepare="husky install"→npm run prepare→ 加pre-commit钩子。- 写
commitlint.config.js,然后再加commit-msg钩子(顺序别反)。 npm i -D commitizen cz-git,补package.json的config段与prompt段。- 补
package.json的 lint / commit 脚本。 - 按第十三节逐步验证,全部通过后再提交。